
Size Matters: A Tribute to the Sony A7 and Minotar 35mm

[shoplink 48054 ebay]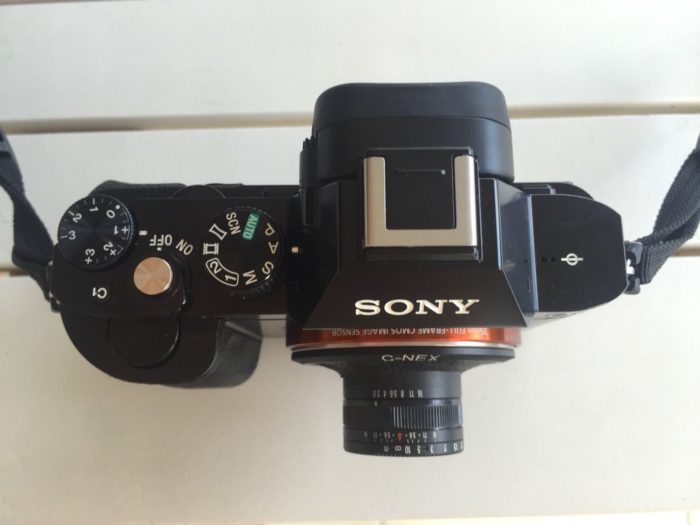 [/shoplink]
The following review is a guest post from Dean Vuksanovic. To write a guest post follow the instructions on that page. Thanks!
———————-
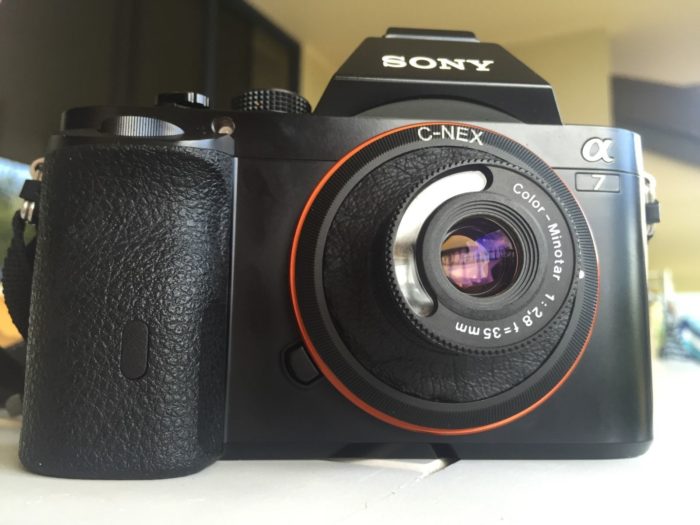
Hello fellow camera enthusiasts and Sonyalpharumors readers! This guest post is a tribute to my favourite lens which, when combined with the original Sony A7 camera, makes for the world’s smallest and lightest digital full frame system with a 35mm field of view. We are talking about none other than the [shoplink 48054 ebay]almighty Minotar lens[/shoplink] adapted from the Minox 35 film cameras.
First, a few key words to describe the Minox 35 camera: classic, miniature, plastic, folding, squinty viewfinder, zone focusing, 1974-2003, super crazy sharp, Tessar, f/2.8, cheap, great.
This camera seems to have a cult following and it’s easy to see why – it’s tiny yet creates spectacular images. Its moderately wide and bright Tessar lens (4 elements, three groups) has excellent sharpness and contrast with little distortion, which is quite unusual given that the classic Tessar design is more suited for the standard 50mm FOV. This lens remained largely unchanged throughout the Minox 35 production – most models had the single coated Minotar lens with the not-so-great 0.9m close focusing whilst the subsequent Minoxar lenses were multicoated with the slightly less not-so-bad close focusing of 0.7m. For whatever it’s worth, Minoxars have the same close focusing distance as Leica M lenses so you learn to live with it.
Oh, there is also the [shoplink 48055 ebay]Kiev 35a[/shoplink] – a Soviet clone of the Minox 35. I use the word ‘clone’ loosely here, it is truly craptacular in every imaginable way except for that excellent [shoplink 48056 ebay]Korsar 35mm f/2.8 lens[/shoplink]. I have shot with it on [shoplink 48057 ebay]my A7[/shoplink] and it is every bit as wonderful as the real deal.
Now on to some pictures:


Minoxar wide open at f/2.8
Images created by these Minotar/Minoxar/Korsar lenses on my A7 camera have special qualities that really appeal to me. Key word here being “me”, you might think that image quality sucks and that’s OK, it probably does when compared to Sony/Zeiss glass. I use this lens almost exclusively because I am enticed by the beautiful painterly look of pictures, great sharpness and contrast in centre at all apertures, the vignetting in corners wide open, the flare!, manual focusing and the tiny size. Black and white conversions with uncorrected vignetting gives an authentic film look – yes this phrase has become so overused it’s become meaningless but in this instance it’s true :)
Now to the gotchas. If your subject is well off centre and you want it to be tack sharp, then the image deterioration towards sides and corners at wider apertures will annoy you. I believe this occurs due to the relatively thick filter stack of A7 cameras, results on 35mm film are certainly better in this regard. If sides/corners are important, stopping down to say f/5.6 or f/8 takes care of this. Also, manual focusing can be downright frustrating in absence of a true viewfinder patch (analogue viewfinder patch as in Leica M or digital as in Fuji x100s). Let’s hope that future Sony A7III+ cameras will have improved manual focusing implementations for vintage lenses that go beyond focus peaking, the ‘shimmering effect’ or the clunky image magnification.
Since you made it all the way through this post to here, here is a little bonus extra: a basic guide to adapting your own Minox 35 lens for your Sony A7 or NEX cameras. The adaptation itself is a bit of an ordeal but it is achievable. Please note that you can get seriously hurt with this and it is done at your own risk. I cannot be held responsible for any damage to anyone or anything as a result of following these steps. If unsure, just don’t do it. If you choose to proceed, you will need the following: a broken Minox 35 camera with a functioning lens, a set of small screwdrivers, a small grinder tool, C Mount to NEX adapter, high-strength metal glue (not superglue due to outgassing), safety goggles, patience, maybe a sedative. The basic steps are (1) remove lens from camera body, (2) the lens innards like the wires and shutter pieces need to be removed and shutter blades permanently opened by glueing the little levers in their open positions (remember, no superglue!), (3) lens back cover can be screwed back on and then glued on the c-nex adapter after grinding down the four corners of the lens metal backing so that it can be directly and flatly placed on the adapter. The glue that works for me is the Araldite epoxy because it is super strong and the curing time is just long enough to allow careful centering of the lens over the adapter, a crucial part of this experiment. Some downward pressure on the lens during glue curing is recommended, and (4) once glue is set, the correct focusing needs to be adjusted by putting focusing ring on the lens to infinity, unscrewing 3 tiny screws on the focusing ring and removing it, placing lens as is on your camera, adjusting front lens cell until perfect infinity is achieved in magnified view, and then carefully screwing the focusing ring back on without moving the front lens cell. Cut out and glue leather around the base of the front part of the lens as per taste.
Happy shooting!
Dean Vuksanovic
Thansk Dean for your article! To all SAR readers: To write a guest post follow the instructions on that page.