
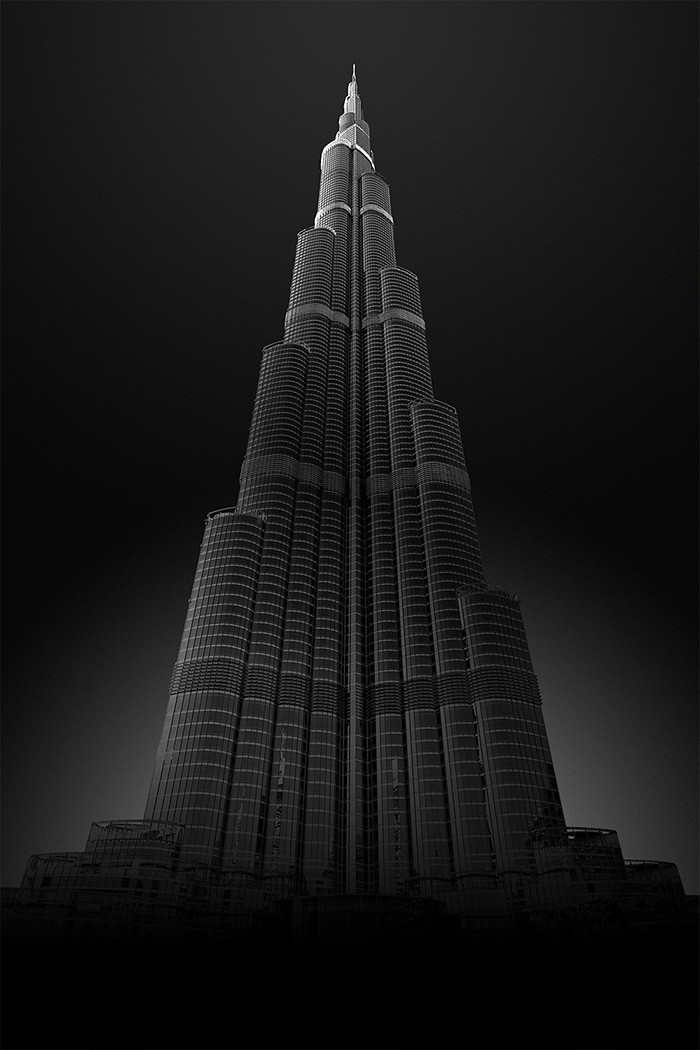
The Burj Khalifa – Dubai – UAE shot (by Minas Stratigos)

 Minas Stratigos on SonyAlphaForum
Burj Khalifa – Dubai
Shot with a6000, Sony 10-18 OSS lens
Please visit my flickr profile for more photos https://www.flickr.com/photos/stratigm/
–
I noticed Minas Stratigos Burj Khalifa shot got some attention on SAR and our SonyAlphaForum. People asked how he “created” that image. I asked Minas Stratigos to explain how he took the image. He kindly sent me that guest post article:
—-
VISION
I was looking for a view of the Burj Khalifa that would be pleasing to my eye, my aim was to capture the whole building in one frame. I took different shots from around the building and I selected this photo as it had the best composition. I wanted to show not only the height of the building (tallest artificial structure in the world – 829.8 meters) but also its massive volume.
I was disappointed because the day I was there the sky was bright blue with no clouds in sight (I was looking for a long exposure to catch a few cloud streaks), so that’s when I decided that my image would have a black sky with different shades of white. I envisioned my photo to lead the eye from a total black look at the bottom to a bright top through different zones of B&W.
MY WORKFLOW
I use to follow a specific workflow to create my images, see below the basic steps I follow:
in Adobe Camera Raw
Clean spots if any,
Level and crop the image,
Adjust exposure, contrast, highlights etc and then open the file in CC 2015
in Photoshop
Reduce noise where required (by the way, with Sony a6000 I get less noise than my brand new A7RII in long exposures)
Create luminosity masks on the colored image
Create the hard selection (usually to isolate sky from buildings but not only)
Convert to B&W, usually three exposures Under, Normal, Over
Darken the sky
Work on different layers, based on the normal exposure and adjust contrast by using luminosity masks, curves, levels and gradients
Create the lights based on the envisioned image using gradients and brushes
Add grain
Dodge and Burn layer (50% grey, soft light)
Selective sharpening with one or more high pass filters
Final retouches
TECHNICAL DETAILS
This image was shot with the Sony a6000 and my favorite lens the E 10-18mm F4 OSS at 13mm (I even use it with the a7RII, works well between 13-16mm), f8, 1/250 and ISO 100
For more of my images and updates online visit either my flickr account https://www.flickr.com/photos/stratigm/
Or 500px https://500px.com/minasstratigos